First thing required to setup is a lab is of course to prepare the infrastructure. In this project I will be using Parallels Desktop 17 VMs (since I am working on MacOS), but any kind of virtualisation software (HyperV, VirtualBox) or cloud deployment will work.
To save time when creating multiple instances of indistinguishable VMs I recommend to use IaC (Infrastructure as Code) software. In this scenario I will be using Packer by Hashicorp, which allows creation of multiple identical machine images from single source of configuration.
Not only this is convenient when it comes to saving, but since machine images are declared in .json files it allows to store their configuration in remote repository.
Packer can be installed on host machine using package manager, in my case I am using MacOS’s Homebrew. Before the actual installation one needs to add Packer’s repository:
brew tap hashicorp/tapAfter that software is installed using following command:
brew install hashicorp/tap/packerStrength of Packer lies in it’s versatility. You can use it to build VMs for multiple different virtualisation platforms, and also cloud solutions. Full list of compatible software can be found here.
For my lab I’ve decided to use Centos 8 Stream VMs, but you are welcome to use any Linux distro you are familiar with.
In order to build VM using Packer you need to declare a .json file to describe a template which will be used to build an actual VM instance. Machines are generated from configuration used in builders. Each platform has dedicated set of builders; you need to specify which one you are using in “type” field. Most of the arguments are similar for different builders, but there might be some differences here and there.
Here is builder which I used:
 "builders": [
      {
        "type": "parallels-iso",
        "iso_url": "{{user `url`}}",
        "iso_checksum": "{{user `checksum`}}",
        "parallels_tools_flavor": "mac",
        "ssh_username": "{{user `ssh_username`}}",
        "ssh_password": "{{user `ssh_password`}}",
        "disk_size": "60000",
        "cpus": 2,
        "memory": 2048,
        "guest_os_type": "centos",
        "vm_name": "{{user `hostname`}}",
        "output_directory": "{{user `user_path`}}{{user `output_folder`}}{{user `hostname`}}",
        "ssh_timeout": "20m",
        "shutdown_command": "sudo /sbin/halt -p"
      }
    ]
Some basic information about VM needs to be passed to builder, including number of assigned CPUs, size of disk, amount of memory host OS etc. Additionally you can customise name of your VM, place where it will be stored on host machine and SSH information used to connect to VM.
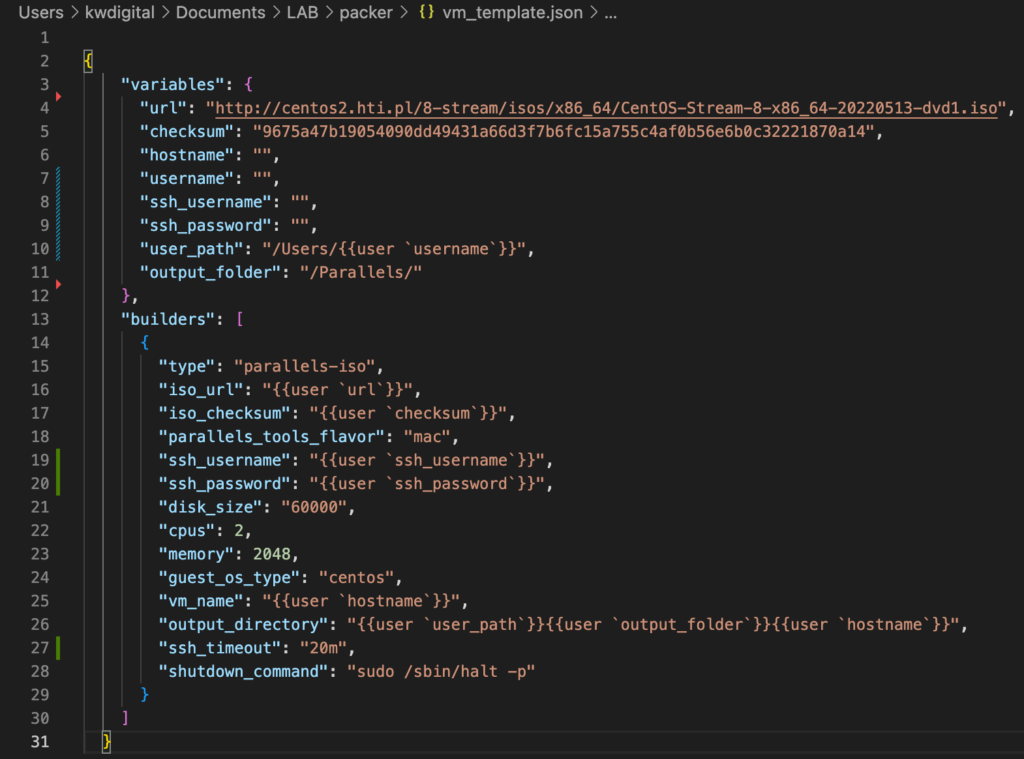
For greater versatility of the template it is recommended to use variables. This way instead of hardcoding particular values, you can leave them blank and fill in when running the actual build command. Below you can find variables part of my template:
{
    "variables": {
      "url": "http://centos2.hti.pl/8-stream/isos/x86_64/CentOS-Stream-8-x86_64-20220513-dvd1.iso",
      "checksum": "9675a47b19054090dd49431a66d3f7b6fc15a755c4af0b56e6b0c32221870a14",
      "hostname": "",
      "username": "",
      "ssh_username": "",
      "ssh_password": "",
      "user_path": "/Users/{{user `username`}}",
      "output_folder": "/Parallels/"
    },
Variables which are filled in are the default values, but you can still override them when running the packer build command. Putting things together template looks as below:
By the way, you can find this template file in my project repository.
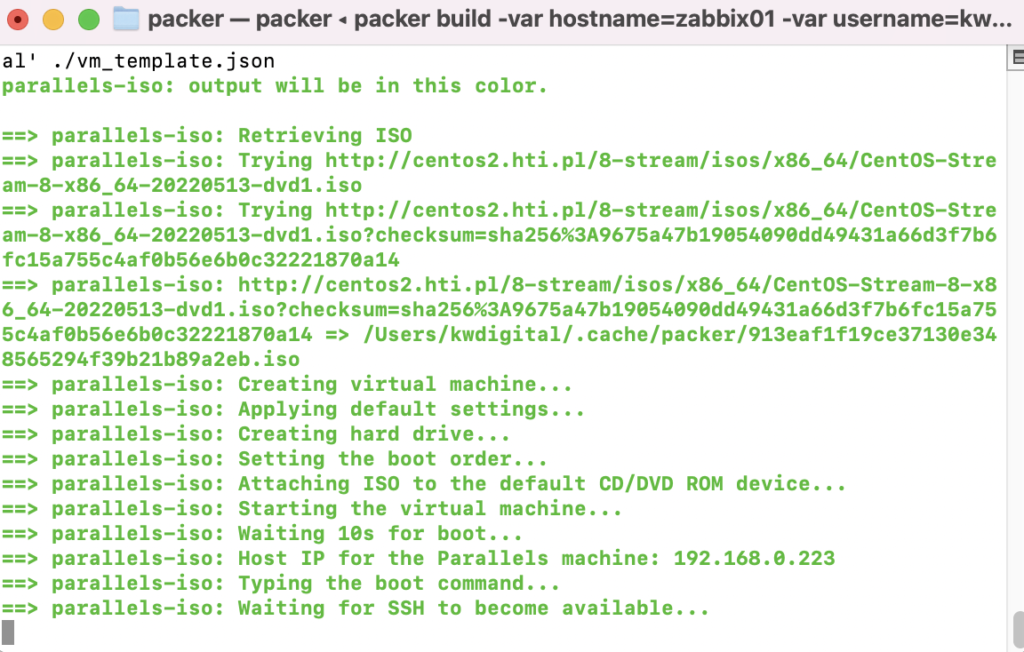
In order to create an instance from .json template you need to run “packer build” command while also providing values for empty variables. An example command might look like the one below:
packer build -var 'hostname=mgmt01' -var 'username=kwdigital' -var 'ssh_password=my_password' -var 'ssh_username=kwdigital' ./vm_template.jsonAfter executing the command you should see similar output in your CLI:
After downloading ISO your virtualization software will start new VM instance and boot it. Once it is done proceed to install operating system:
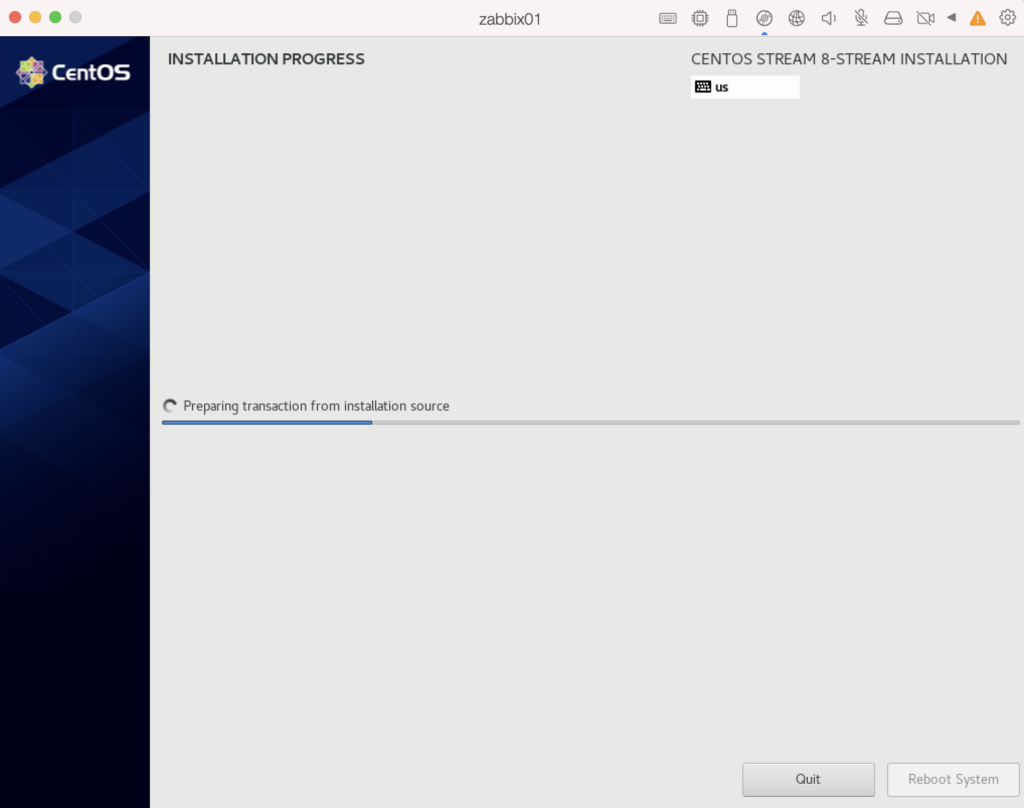
Rinse and repeat 3 times so all nodes of the environment are created.
That’s it! The cool thing is you can run multiple instances of packer build simultaneously which definitely saves a lot of time.
In my next post I will describe configuration of management server using Ansible.